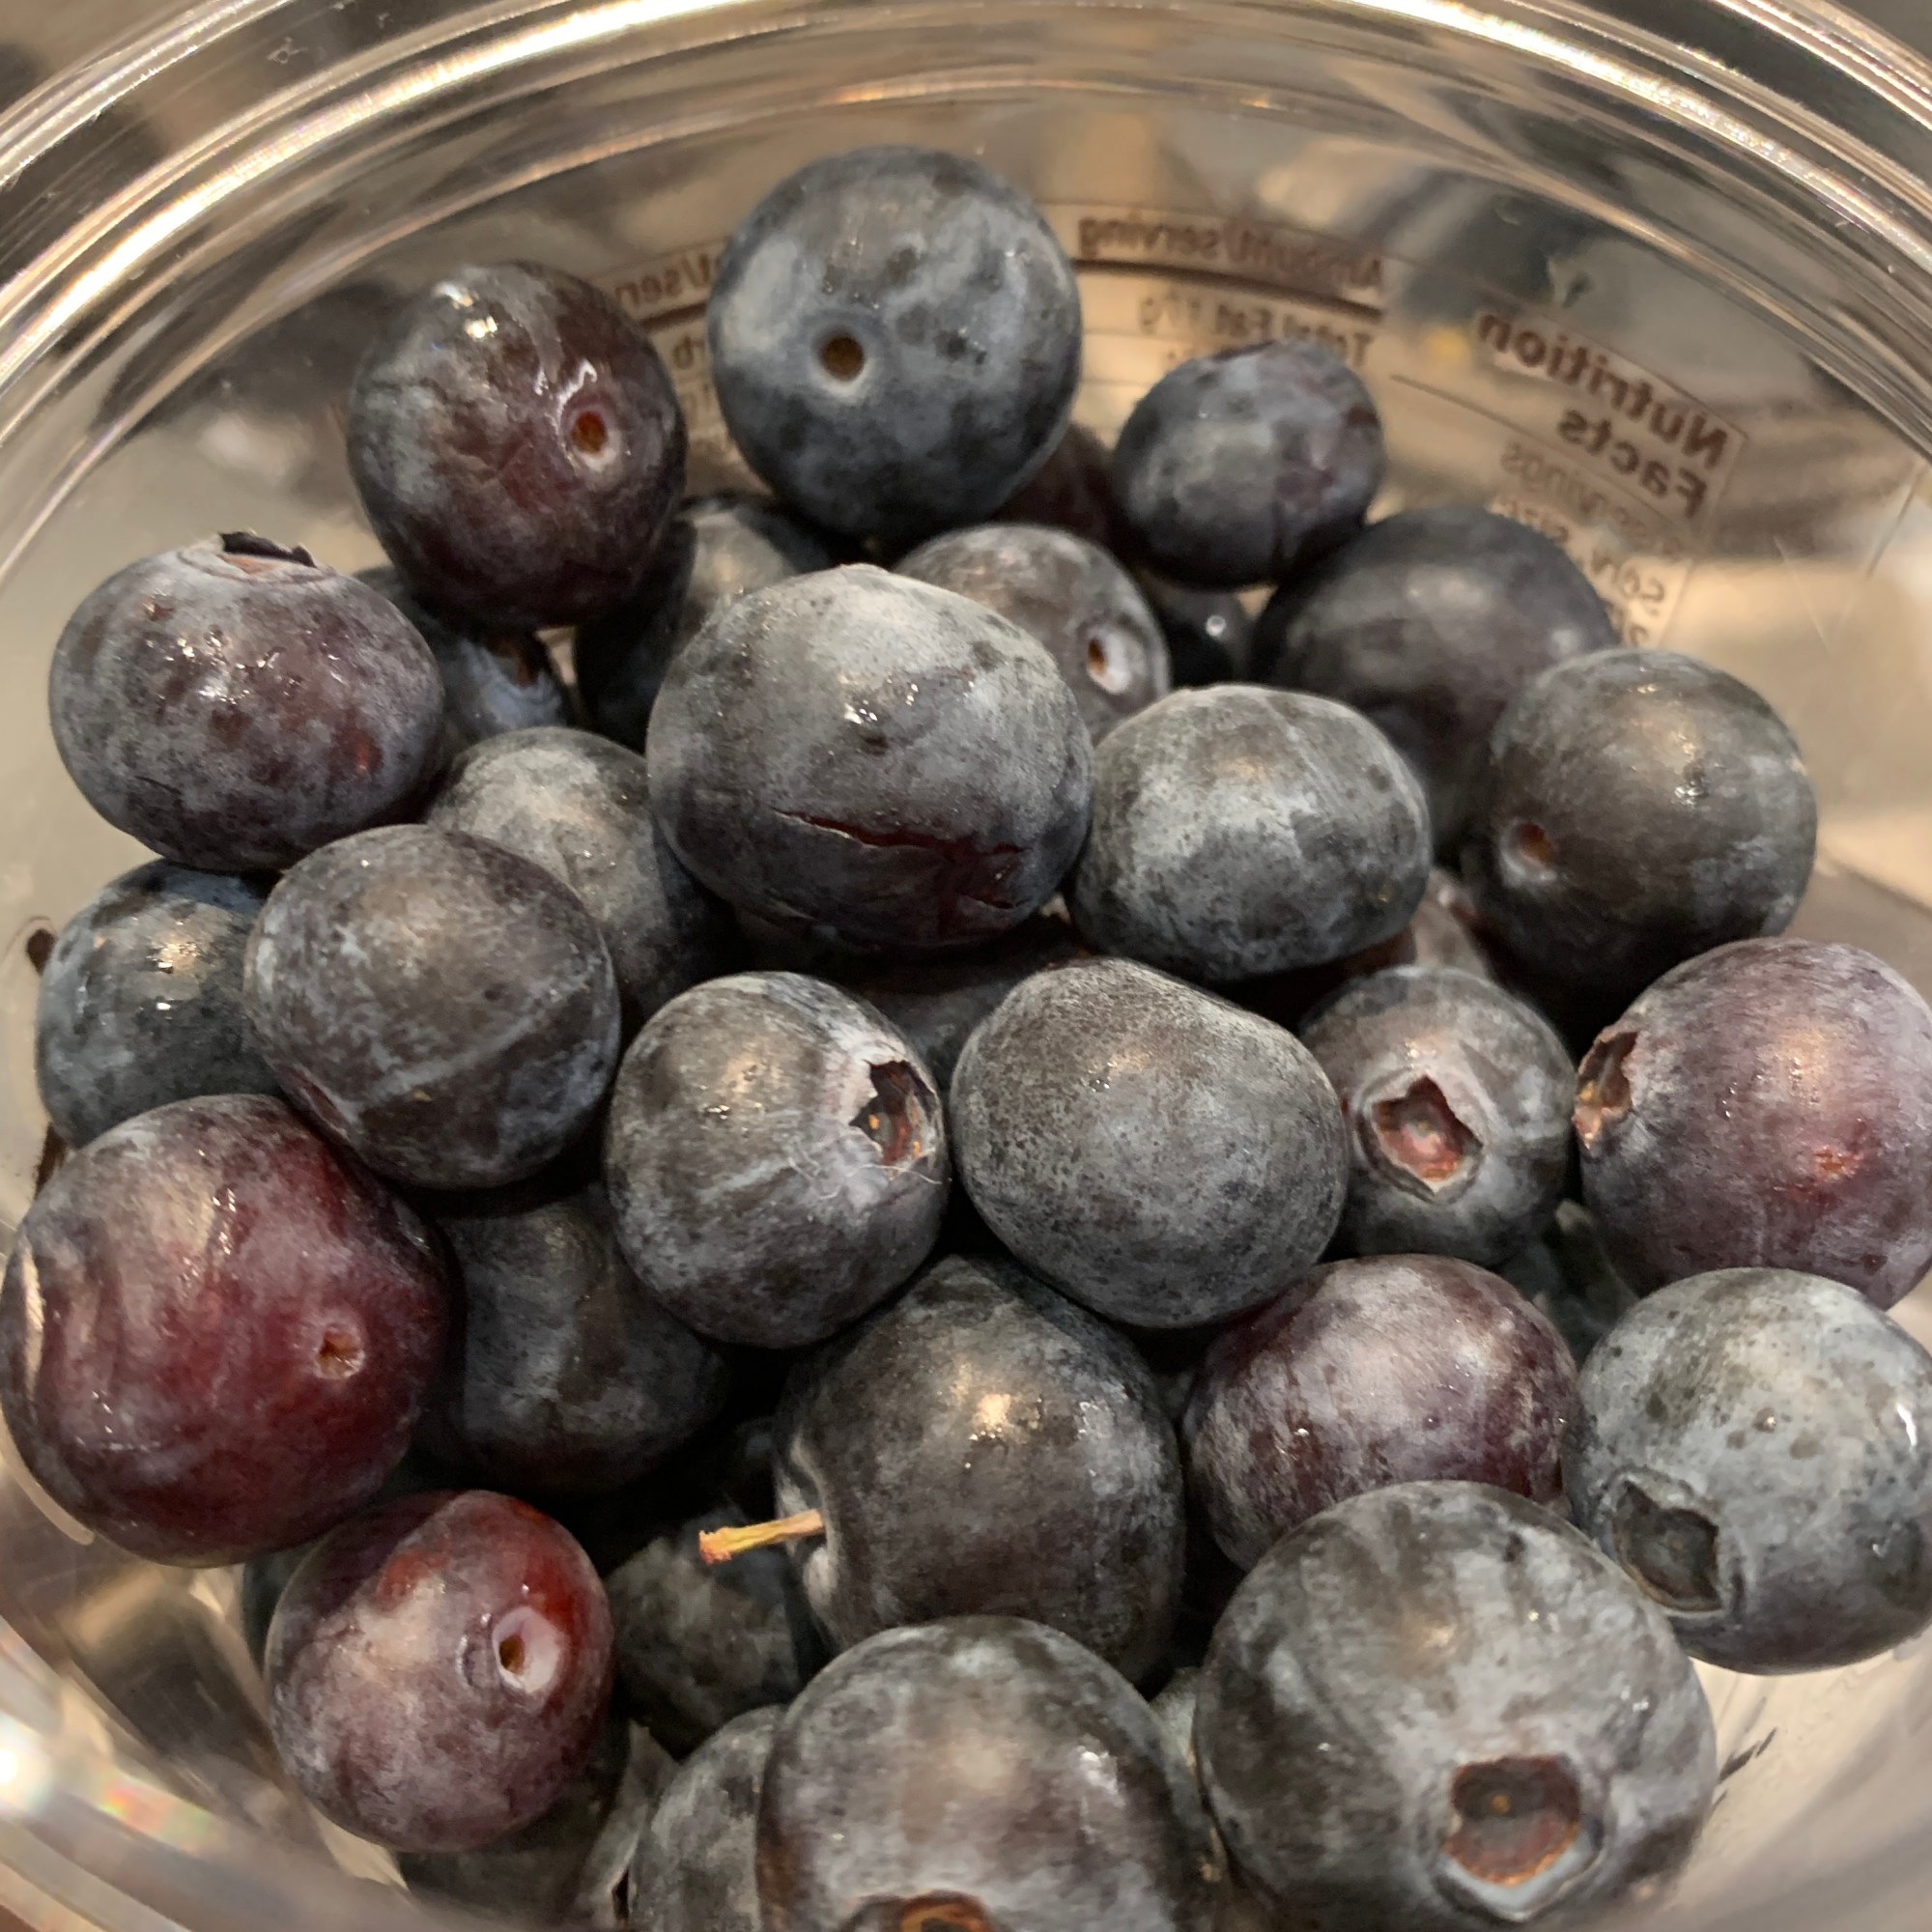
Making homemade jam wasn’t my thing but I learned to make it because I wanted my family to enjoy my homemade bread with something fresh and clean. Clean meaning, no added refined sugar and preservatives. This is a very easy recipe that I use as a spread, as topping for my yogurt snack, add-on to my overnight oats for breakfast or even an addition to my homemade dairy-free ice cream. By the way, I tried this same recipe using blackberries and raspberries. You can use any kind of fresh OR FROZEN berries you have in handy, wherever you are 🙂
Start by washing the blueberries. In a medium stainless steel sauce pan, place the blueberries and add the sugar, lemon zest, lemon juice, vanilla and a pinch of salt. Turn on the burner to medium high. Using a potato masher, gently smash the blueberries while it is starting to cook. Leave some berries tact for texture. When the mixture starts to boil, turn the burner to low then add the chia seeds.
Cook for 10-15 minutes, mixing a couple of times or so. Add the xanthan gum and continue to cook for 5 minutes. You can omit the xanthan gum because the chia seeds will help thicken the jam already.
The lemon will balances the sweetness. You can also omit the monk fruit when blueberries are in season and are naturally super sweet.
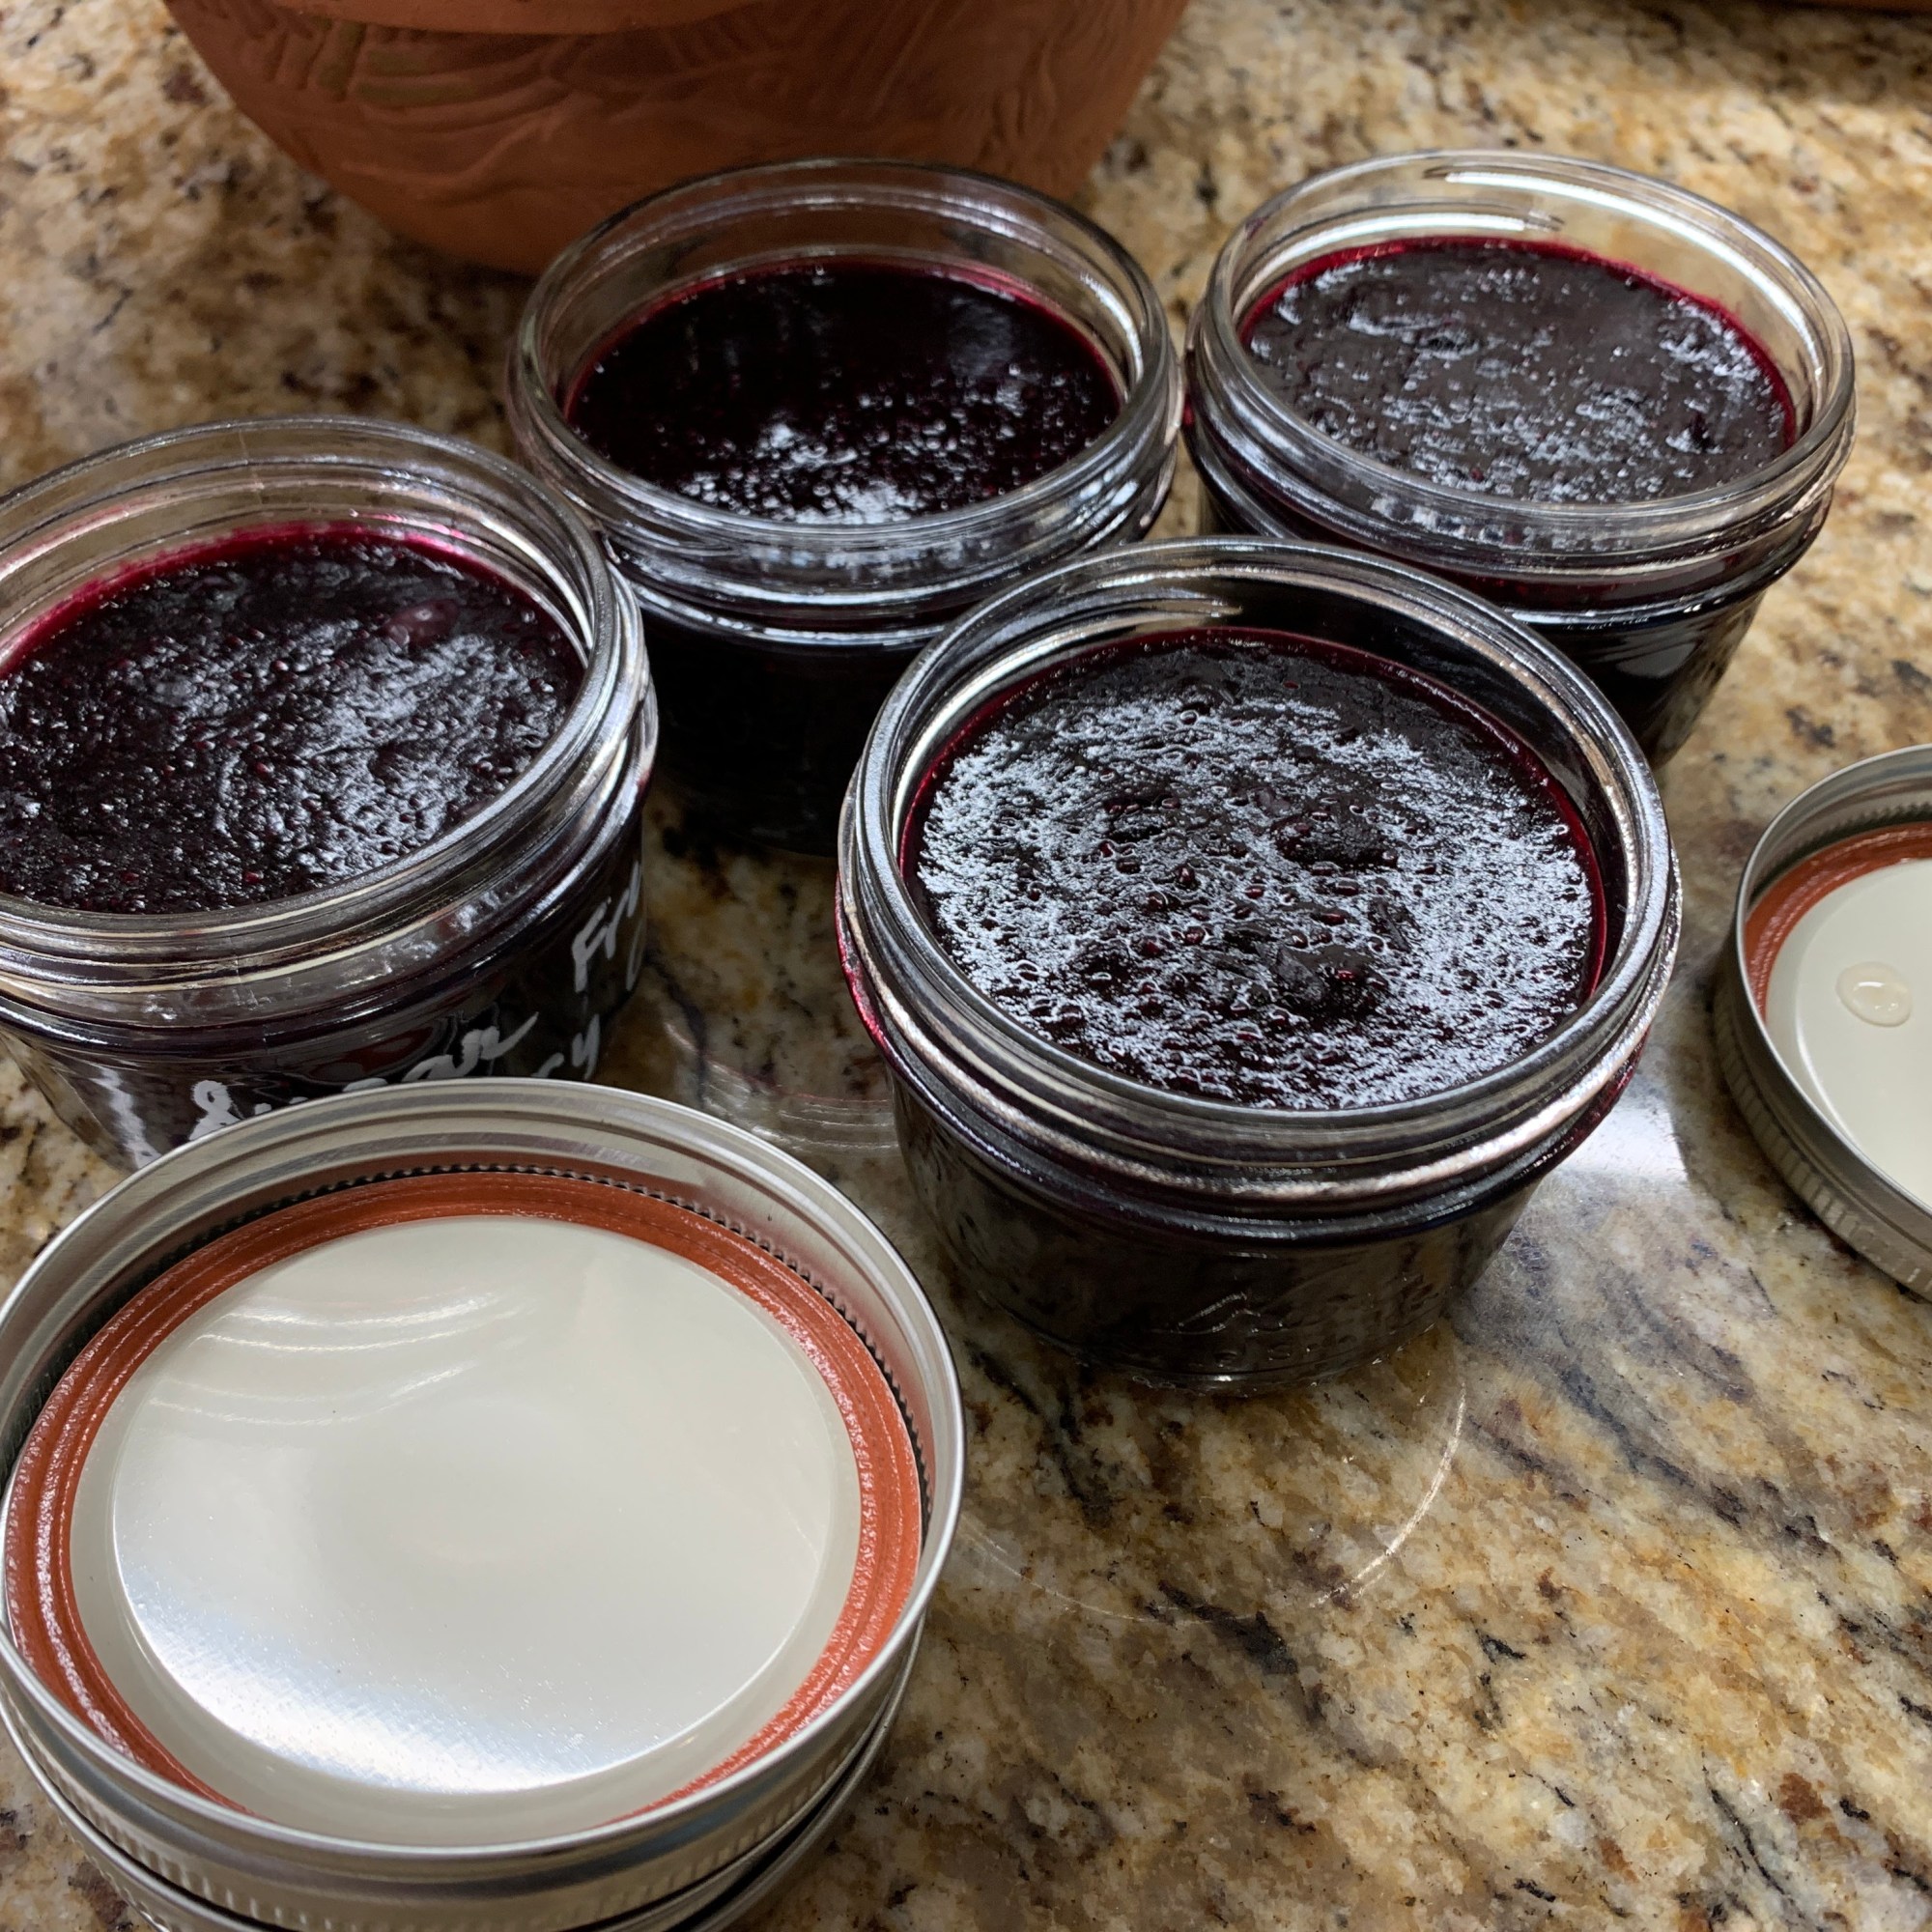
This is our go to jam. I put them in small 8 oz. jars. Each jar is only 165 calories. I hope you try and make this too. It’s one of my super easy recipes that I truly want to share to all of you. If you liked this recipe, please share it to your friends. Thanks!
I mastered this super easy bread recipe just a few months ago. After staying home for almost 3 months due to COVID-19, I learned to bake different kinds of things like cakes, muffins, cookies, sweet buns, dinner rolls, keto bread, gluten-free buns, etc. After weeks and weeks of cooking and baking, just like a lot of other people, my family and I gained weight. It was expected but we were not happy about it. With positive attitude and collective effort, we decided to be consciously healthy moving forward.
To bake this bread, I use the best local ingredients available and I buy from one of my favorite ETSYStore, AOSUPPLY. They have the best flour and yeast and their service during the pandemic’s stay-at-home order was excellent. Check them out and see for yourself.
Use coupon codeDOYD74when you order to receive $3.00 OFF your first purchase
I also buy flour from JOEL’S ORGANICS. My brother and his wife lives in Walla Walla County of Washington State. I was able to purchase Joel’s Organic products from their local coop store. They have very fresh products and I am very lucky that my family ships my Joel’s Organic flour directly from Walla Walla to Orange County here in California.
Use coupon codeDOYD74when you order to receive 10% OFF your purchase
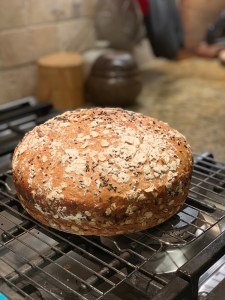
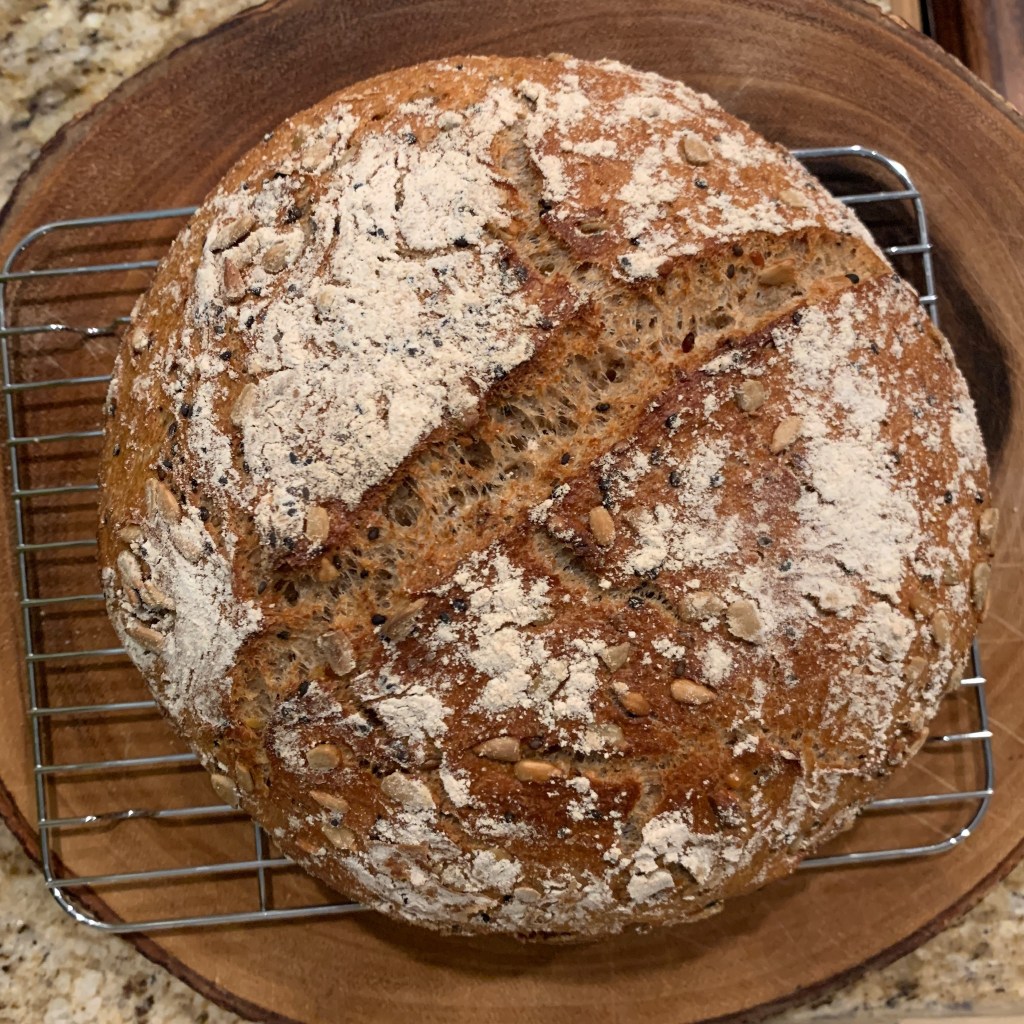
I am sharing my recipe of this Multigrain Whole Wheat Bread so you can enjoy this dense but light on the stomach bread. It’s easy on our digestion and low-glycemic. This is my breakfast, my snack, my desert, or my after dinner treat. Try to make it and let me know how it goes.
INGREDIENTS:
18 ounces Lukewarm Water
1/4 teaspoon Instant Yeast
1 1/4 teaspoon Salt
1 tablespoon Honey
1 tablespoon Olive Oil
2 cups Whole Wheat stone-ground fine Flour
1 1/2 cups Hard Wheat, stone-ground Bread Flour
1/2 cup Harvest Seed Blend
Some rolled oats for topping before baking
DIRECTIONS:
In a large bowl, add lukewarm water. Add the yeast, salt, honey and olive oil. Mix gently until everything is combined. Add the harvest seed blend and flour. Using a wooden spoon, gently fold the ingredients together until it forms a dough. No need to mix very well, as long as the ingredients are combined well, it should be ok. Cover the bowl with a cling wrap and proof for 4-5 hours. I use a proofing oven to consistently proof my dough.
After first proof, mix the dough with a spatula, removing the air. Shape into a ball, sprinkle with some rolled oats and bread flour and proof for another 30 minutes to an hour, depending on the weather where you live.
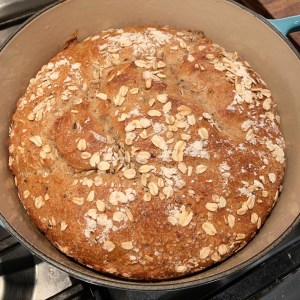
Preheat a greased Dutch Oven to 450°F. When it is preheated, carefully remove the hot Dutch oven and slowly transfer your dough into it. Cover and bake for 30 minutes in the middle rack. After 30 minutes, remove the cover and continue to bake for another 5 minutes to make your bread crusty. Remove from Dutch oven immediately when finished and transfer on a wire rack to cool.
RECIPE VARIATION:
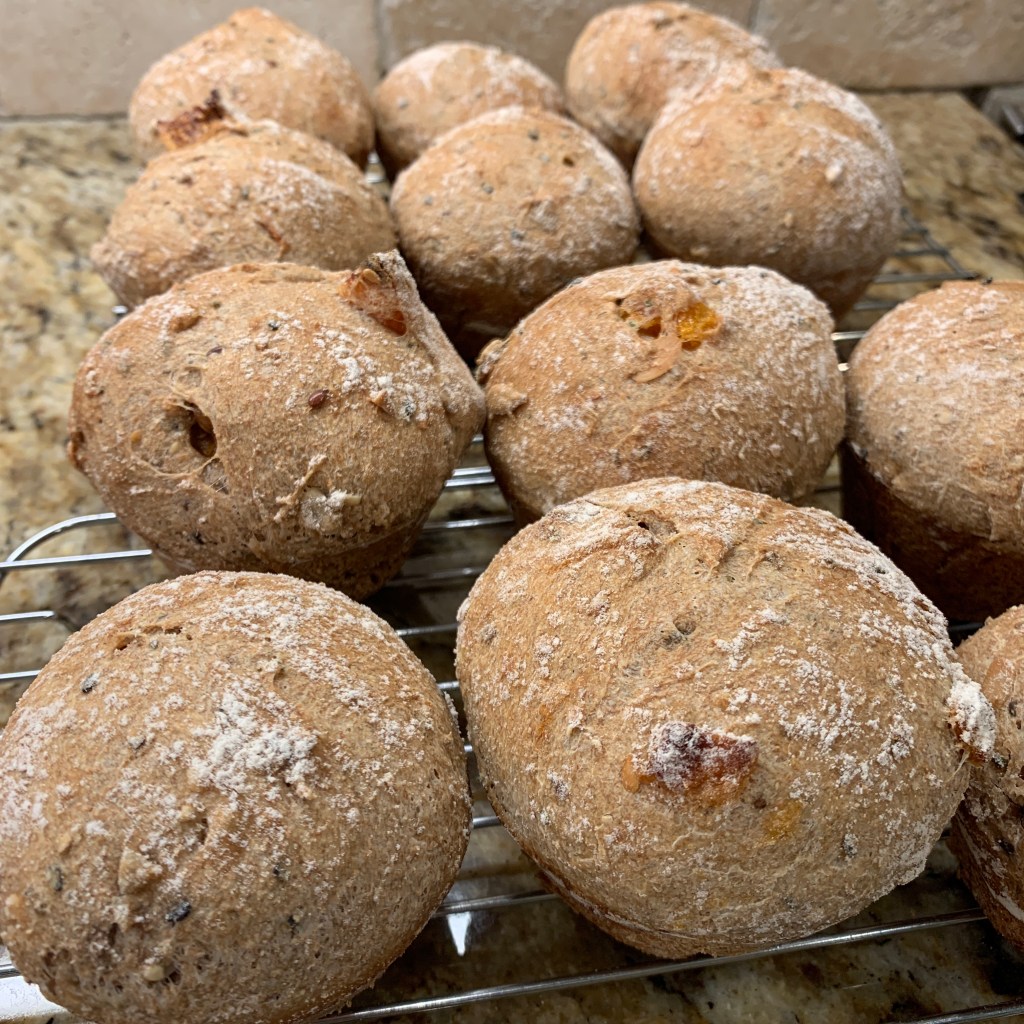
Using the same recipe above, I did two variations. First, I added 1/4 cup of chopped dried figs and 1/4 cup dried apricots. My second variation was instead of using harvest seed blend, I added 1/2 cup halved walnuts and 1/4 cup chopped apricots (one of my favorite combinations). I add the fruits and nuts after the first proof. Mix it well so that it’s ready to be transferred to the Dutch oven for baking.
FIGS AND APRICOTS
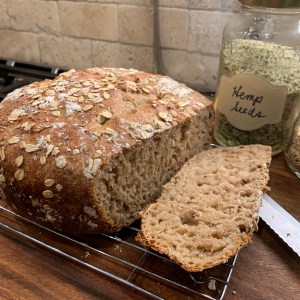
MEDIUM LOAVES
MUFFIN BUN
WHOLE LOAF
Each slice of my whole loaf with the variated recipe is only 98 calories. No need to add butter, cream cheese or jam. The figs and apricots sweetens the bread enough to enjoy it as it is.
I hope you enjoyed reading my post. Please try baking it. It takes about 10-15 minutes to prepare and mix the ingredients together then you can leave it for proofing. I am excited to know how your bread will turn out. THANK YOU for visiting my site. If you liked my post, please hit the like button below.
I’ve always wondered how to bake bread but I am a coward in terms of handling yeast. I have cooked many kinds of meals from different cultures but when it comes to using yeast, I am always intimidated. Why, you ask? I guess it’s because I never really saw how bread was made when I was young. It’s only now that we have YouTube, eBooks, Pinterest, etc. that I learned and discovered the many ways to prepare food and this trained me to cook better.
My whole grain Artisan Bread
Many years have gone but it’s only now in 2020 that I realized I wanted to try again and learn to bake bread. The COVID-19 Pandemic was actually the primary reason why I explored new ideas at home while on stay-at-home order and I courageously faced my fear (from yeast…. yes, instant yeast).
Back in March 2020, my first ever try was to make a pizza dough for my family. During the start of the COVID pandemic, I wanted to do fun things with my children and I knew that if they made their own pizzas, they would be super excited. It was a success! I usually research online for recipes and watch YouTube videos on how other people make it. Then I write down my own measurements and ingredient preferences. After which I try to make it myself.
My first pizza dough plus each family member’s pizza creation
This is the story of how I faced my fear. From that day on, March of 2020, we never had store-bought bread at home. I tried many types of bread recipes and I will share them to you on my next posts.
To all those who haven’t tried baking, try it! Baking our own whole grain bread is actually one of the greatest things that happened to our family. We used to all love to eat white bread. But now, all of us eat whole grain all the time. I still bake special treats for my family of course. That is part of eating healthy, rewarding ourselves with treats. Treats that I made myself knowing that I only use the healthier ingredients.
PIZZA DOUGH RECIPE
Ingredients:
4 cups All-purpose Flour
1 1/2 teaspoon salt (I use pink Himalayan salt)
1 1/2 teaspoon instant yeast
1 1/2 cups of lukewarm water
1 tablespoon olive oil
Procedure:
Using a stand mixer, mix the flour, salt and yeast. On low speed setting using the paddle attachment, start mixing the dry ingredients then add the water. Mix until the dough forms. Transfer the dough to a large bowl drizzled with olive oil. Make sure to coat the dough in oil, knead a little bit and form into a round dough. Cover with plastic wrap and proof for 2-4 hours at room temperature (I always use my proofing oven to be precise).
After rising, you can use the dough immediately and prepare to shape into pizza sizes that you prefer or you can store the dough in the refrigerator for up to 2 days (make sure to rest the dough at room temperature before using).
This recipe is enough to make 4, 8-10 inch pizzas just like what we did. Bake your pizza at 450°F for 7-12 minutes depending on how big/small, thick/thin your pizza will be. Sometimes, I pre-bake the flattened pizza dough for 5 minutes, then add my toppings and bake it for another 5-7 minutes. It really depends on your preference.
I am planning to make some dough tonight and keep it for tomorrow’s Friday night pizza. What’s your plan?
‘Til my next post…. If you enjoyed reading, please like my post and thanks for reading.
One of my favorite snack recipe that I learned from Maangchi is Gotgamssam Salgussam. I enjoy how easy it is to make these and I also love how healthy and filling it can be.
It’s been a couple of years since I last made some of these but last week, I was able to buy good quality dried persimmons at our local Korean Market (H-Mart). I also purchased organic dried Turkish Apricots from a Persian market here in Laguna Niguel.
It is always best to use whole walnuts but I only found halves and pieces at Trader Joes.
When you try it, have it with your favorite Tea. Enjoy!
Green is her favorite color. That’s the reason why I am using green fonts for this post.
In a few days, our younger daughter is turning 4. I’ve been asking around OC Mom groups about finding a good photographer who can do a mini-session with my daughter so that I can have a photo memory of her turning 4 years old. Money is an important consideration so after contemplating on it, I realized that I was the one who took all the pictures of my eldest daughter years ago, so why not grab my cameras, bring some toys, extra cute clothes and put them in my mommy bag and start heading for the nearest park.
We spent almost 2 hours playing, running, talking, and laughing and I ended up taking 60+ shots of her and I will be keeping around 15 compositions that truly captured great memories of her.
Next plan… another photo shoot – this time with her big sister.
It’s been months; I agree. I have my reasons and here’s my proof 🙂
It’s not a joke to undergo first trimester specially if you’re the kind of woman that I am. I’ve been sick (to my stomach) – worst case of morning sickness ever. If you put yourself in my shoe, I don’t know if you will have the energy, will-power and motivation to write up something on your blog as well (LOL!!!).
I am 20 weeks pregnant now and we are expecting a baby girl Spring of 2011. My precious Jade will be a big sister soon. Bok and I will be parents to two beautiful princesses. I really can’t wait… ahhhh… uhmm… actually, I “can” wait. I want to enjoy each day that I am pregnant because this is all part of our family history. Now that I am feeling much better, I am more content.
I cannot blog on new recipes yet because since I had an extreme case of morning sickness… I stopped cooking for 3 months!!! IMAGINE THAT? 3 long months! I just can’t stand the smell and my energy was to it’s extreme low. So to all of you who are awaiting for another “secret” recipe (as if… LOL!) by me, you’d better be more patient.
I was thinking of sharing recipes on how to make baby food when our new baby arrives. Wouldn’t that be interesting?
Okay, now I need name suggestions for a girl. Feel free to message me!
Before I go, I just wanted to say that my favorite ultrasound photo is the last one at the bottom right. She was nibbling on her cute tiny foot 🙂
Summer is the season I am not so excited about. Not only because of the heat, but because of the yearly wild fires in California. What makes summer fun and exciting? Creating and whipping up refreshing meals and desserts to cool down my family on a very hot and windy summer day.
Patbingsu is a famous Korean snack/dessert served with shaved-ice, mixed fresh fruits, some rice cakes, sweetened azuki beans (known as “Pat”) and frozen yogurt or ice cream.
Living in a community that doesn’t have any Filipino restaurants, I sometimes crave for my childhood favorite summer treat, Pinoy Halo-Halo (translated to English as Mix-Mix). Patbingsu is the closest I could find that is similar to Halo-Halo.
I wanted to create something that I could call my own so instead of putting frozen yogurt or green tea ice cream, I tried Igname (purple yam) ice cream and it turned out great! purple yam (or Ube in tagalog) ice cream is a very famous ice cream flavor for Filipinos and I remember eating this as I was growing up. Buying from street vendors known as “mamang sorbetero.” I always ask for the purple yam flavor and the classic cheese ice cream.
I first heard about Patbingsu from a friend who is married to a Korean and she always goes to a korean market who sells Patbingsu. My first taste of this dessert did not really give me too much excitement but that was because the seller’s version wasn’t that good. When I tasted another kind of Patbingsu with a good quality frozen yogurt on top, I really started to like it. 🙂
Luckily, I live close to a Korean Market so I have all my ingredients easily available. It’s very easy to make:
INGREDIENTS:
Fresh strawberries (sliced or diced)
Golden kiwi (sliced or diced)
Canned sweetened Azuki beans
Fresh melon (diced into small pieces)
Cold seedless watermelon (diced into small pieces)
Shaved-ice
Sweetened condensed milk
Small pieces of tteok (rice cakes)
Bananas (optional)
Corn flake cereal (optional)
Purple Yam ice cream (available in your local Chinese/Filipino supermarket)
To assemble, start dicing and slicing the fresh fruits. Shave some ice to cover about 1/3 of a bowl or cup. Top the shaved ice with the fruits, tteok, corn flakes and azuki beans. Pour a little bit of condensed milk according to sweetness that you desire. Then finally, put one scoop of purple yam ice cream.
I’ve been swamped! Yes, I was so busy… I couldn’t even find time to write up a short blog thru my iPhone. I’ve been meaning to share some photos on my blog but I truly want to spend at least 10-15 minutes of quiet time writing something and not thinking of other work to do.
I chose this new picture I took last April, I hope you like it. My brother and sister-in-law gave this “Jade Avenue” sign to Jade during our trip to their home in New Jersey. I wish I had seen the Amish County on that trip but our schedule was too tight.
I will try my best to post another recipe this weekend. My daughter advised me to post the Filipino Pork and Chicken Adobo recipe. I cooked it last night and she had two servings 🙂 You should try it! It’s really tasty…
I will buy ingredients this weekend and will share my American Adobo recipe 🙂
I’m sure most of you will like this recipe because it’s one of the easiest, nutritious and delicious soup of all time.
I consider this as one of our family’s comfort-soup aside from our classic Sinigang and Tinola.
This soup is made with Ginseng or other Traditional Vegetable Root Tea available in your Asian Market. It is believed by a lot of Asians to help cure and prevent ailments.
If and only “IF” your closest Asian Market do not have fresh or dehydrated ginseng, you can also use a couple of pure ginseng tea bags as a replacement.
Here’s how to make Korean/Chinese Ginseng Chicken Soup:
INGREDIENTS:
1 Whole medium size Chicken (or large cornish hen)
2 Stalks of Green Onion
1/4 cup of Garlic Cloves
1/3 cup of Glutinous Rice
7-10 pieces of Red Dates (Jujube)
Ginger
Ginseng (Fresh or Dehydrated)
5 pieces of Chestnuts
Cold Water
Salt and Pepper (optional)
Prepare all ingredients. Soak Glutinous Rice for 5 hours or overnight.
Wash your chicken and remove any excess fatty skin. Stuff the cavity of the chicken with the soaked glutinous rice, some garlic, half of the dates and chestnuts and some ginseng. Don’t forget to crush the ginger and add it as well.
Close the opening of the chicken with toothpicks. If you don’t have toothpicks, you can keep it open but place the chicken in a big pot carefully. Put in the extra garlic, ginseng, dates and chestnuts with the whole chicken then pour water enough to cover all the ingredients.
Start to boil for 20 minutes with a foil on top of the pot to cover. When boiling, make sure to remove all the scum to keep the soup clean and clear. Add more water if necessary. When it boils back, cover again with foil then simmer the soup for another 40 minutes to an hour on medium to medium high heat (depending on the kind of pot you’re using).
Before serving, you may add some freshly ground pepper and sea salt and some minced green onion.
Enjoy each slurp of this nutritious soup and each bite of the ginseng, dates, chestnuts, and tender young chicken. I love to eat the garlic on this soup because it melts in your mouth 🙂
If you have questions, feel free to comment and I will be glad to help answer your question/s so you can make your own version of this recipe.